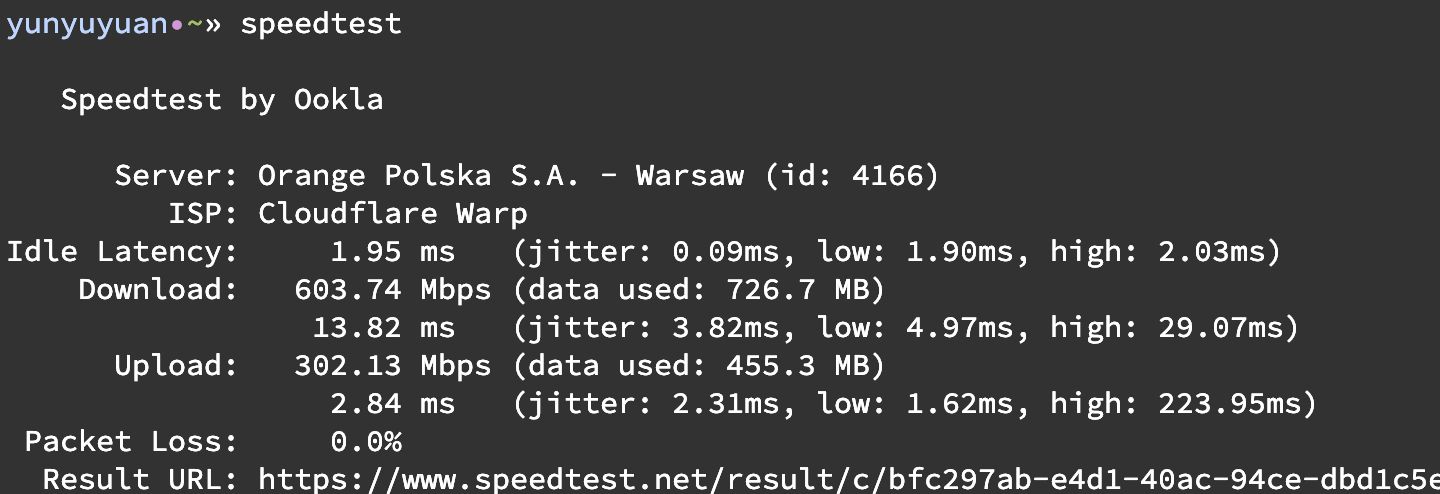
几年前我整了一个国外的垃圾VPS(没错,就是scaleway,详见https://blog.yunyuyuan.net/articles/6167),本来它连ipv4都没有,套上warp后成为了一个可用的中转机器,速度很顶:
 vps自身测速
我给它搭建了v2ray server,它自带ipv6可以直连,但是直连的速度惨不忍睹:
 直连后测速
直连后测速
于是我又给它套上了cf的cdn(就是打开云朵),这时候速度时好时坏,虽然比直连好多了,但是依旧不够用:
 打开cf云朵后测速
开始教程
本着不折腾完美就不罢休的精神,我开始研究变本加厉地白嫖cf 已知cloudflare在全球都有线路入口,随便连上一个都能用,cf只是在dns上做文章。但是具体dns解析到哪个入口ip是不可控的,一种简单的方法就是手动找到速度最快的ip,然后替换节点里的对应域名为高速ip,相当于不依靠域名解析来碰运气了。
解疑
你可能会问:没有域名,cf怎么知道我要连谁的服务?很简单,无论vmess还是其他协议,都可以设置一个host参数,这个填上自己的域名就行了。
我们要做的就是想办法自动化这个流程:找到高速ip -> 修改节点信息 -> 更新订阅 -> 重启openclash。哇,想想都很麻烦。虽然已经有这个工具可以一键找高速ip了,但后面的三个步骤才是最复杂了。
在尝试想各种方案后,我后知后觉地发现,其实只需要在本地的hosts上处理一下就可以了!流程变成了找到高速ip -> 修改hosts -> 重启dnsmasq。简单太多了。
步骤如下
假设你的节点搭建域名是v2ray.example.com。
- 下载CloudflareSpeedTest对应自己软路由cpu的版本,解压在
/root/cloudflarespeedtest下面,并进入该目录。 - 编辑
replace_hosts.sh文件,内容如下:
#!/bin/bash

cd /root/cloudflarespeedtest

# 定义日志函数
log() {
    local message="$(date '+%Y-%m-%d %H:%M:%S') - $1"
    echo "$message"
}

csv_file="result.csv"
log "Start getting ips"
# 最低1Mbps/s,最高延迟2000ms,获取10个
./CloudflareST -url https://cdn.cloudflare.steamstatic.com/steam/apps/256843155/movie_max.mp4 -sl 1 -tl 2000 -dn 10

log "Finish getting ips"

if [ $? -ne 0 ]; then
    log "Error: Failed to get CSV data"
    exit 1
fi

# 检查文件是否存在且非空
if [ ! -s "$csv_file" ]; then
    log "Error: CSV file is empty or not created"
    exit 1
fi

# 创建临时文件
temp_file=$(mktemp)

# 检查是否存在mycf标记
if grep -e "#--- mycf ---" /etc/hosts; then
    # 存在标记,保存标记之前的内容
    sed '/#--- mycf ---/q' /etc/hosts > "$temp_file"
else
    # 不存在标记,复制整个文件并添加标记
    cat /etc/hosts > "$temp_file"
    echo -e "\n#--- mycf ---" >> "$temp_file"
fi

# 添加时间
echo "# $(date '+%Y-%m-%d %H:%M:%S')" >> "$temp_file"

# 处理CSV文件并添加到临时文件,跳过第一行
index=1
tail -n +2 "$csv_file" | head -n 5 | while IFS=',' read -r ip rest; do
    echo "$ip $index.youxuanip.example.com" >> "$temp_file"
    index=$(($index+1))
done

# 添加结束标记
echo "#------" >> "$temp_file"

# 如果存在原始的结束标记,添加其后的内容
if grep -e "#------" /etc/hosts; then
    sed -n '/#------/,$p' /etc/hosts | tail -n +2 >> "$temp_file"
fi

# 替换原始hosts文件
mv "$temp_file" /etc/hosts

log "Hosts file has been updated successfully!"

/etc/init.d/dnsmasq restart
log "Dnsmasq restarted successfully!"
这个脚本会在/etc/hosts里填入以下内容:
#--- mycf ---
# 2025-02-15 18:20:45
104.17.251.214 1.youxuanip.example.com
104.19.168.8 2.youxuanip.example.com
172.66.42.164 3.youxuanip.example.com
104.18.28.100 4.youxuanip.example.com
104.17.234.33 5.youxuanip.example.com
#------- 添加一个crontab任务:
5 */6 * * * /root/cloudflarespeedtest/replace_hosts.sh- 修改openclash覆写/订阅配置,增加如下内容:
rules:
- PROCESS-NAME,CloudflareST,DIRECT- 在你的订阅节点里加5个类似这样的vmess节点(
1.youxuanip.example.com ~ 5.youxuanip.example.com),建议存到gist并配合subconverter使用:
{
    "v":"2",
    "ps":"优选1号",
    "add":"1.youxuanip.example.com",
    "port":"443",
    "type":"none",
    "id":"xxxxxxxx-xxxx-xxxx-xxxx-xxxxxxxxxxxx",
    "aid":"0",
    "net":"ws",
    "path":"/websocket-path",
    "host":"v2ray.example.com",
    "tls":"tls"
}- 享受白嫖的高速节点。
 自选后的速度
原理解析
等我有时间了再画一个工作原理图。